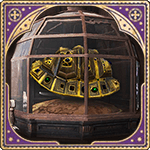
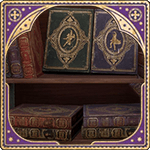
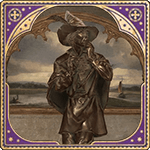
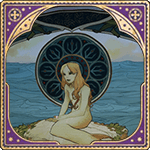
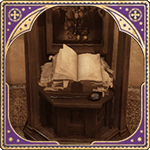
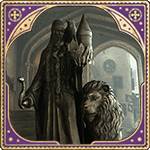
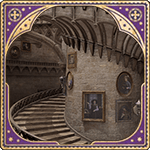
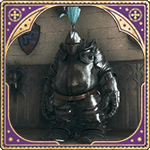
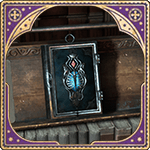
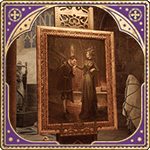
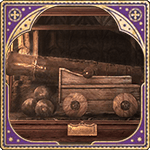
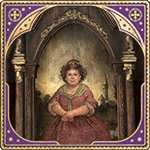
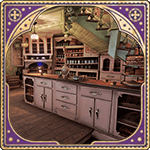
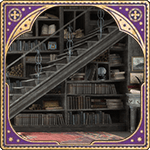
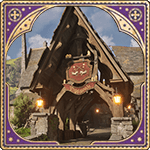
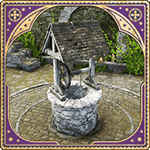
Field Guide Pages in Hogwarts Legacy are collectible Items hidden all around the world. These pages can be found flying around, hidden in rare locations, or hidden with Invisibility Spells. It can be challenging to obtain some of these as they can be seen from far in locations that are tricky to reach, or we may need to cast a certain spell. There are a total number of 38 Field Pages that can be found in Hogwarts Legacy.
Hogwarts Legacy Use Field Guide Pages
Each time a player finds and interacts with a Field Guide Page, they will be able to read a small portion of information, such as a secret nearby location, a solution for a puzzle, or something to help us make a better use of the site we are exploring at the moment where the Field Guide Page was found. Some Field Guide Pages only grant Wizards some Lore information about the area.
Most Field Guide Pages are directly added to the Collections book that can be later checked in the pause menu.
Challenges & Rewards in Hogwarts Legacy
By finding one or all Field Guide Pages of a certain location or area, a message will often pop up saying that a challenge has been unlocked or completed. It is not yet known if these Challenges simply work as achievements, or if there's some kind of active reward, such as an Item. Although, the Field Guide Pages by themselves help us solve nearby mysteries or locate secrets that may help us find useful items.
All Locations for Field Guide Pages in Hogwarts Legacy
Hogwarts Castle
Field Guide Page - Clocktower Courtyard
Description
- Location: Near the Clocktower Courtyard Floo Flames, turn back and use Levioso on the statue that is holding a goblet-like item.
- Requirement: Levioso Spell
Field Guide Page - Defence against the Dark Arts Tower
Description
- Location: Leave the Defense against the Dark Arts class, turn left and climb the spiral staircase. Cast Levioso on the statue.
- Requirement: Levioso Spell
Field Guide Page - Central Hall
Description
- Location: Enter the Central Hall through the Transfiguration Courtyard, and look a little bit above the found in the middle to see the flying page. Cast Accio on it to grab it.
- Requirement: Accio
Field Guide Page - Central Hall
Description
- Location: Ignite a Stone Fire Pit in the west balcony in Central Hall.
- Requirement: Incendio Spell
Field Guide Page - Viaduct Entrance
Description
- Location: At the Viaduct Entrance, look to the wall full of Banners, turn left, and you will see the page flying among the stairs. Use Accio to grab it.
- Requirement: Accio Spell
Field Guide Page - Library
Description
- Location: At the south corner of the upper floor of the Library in Hogwarts. You must solve the empty frame puzzle.
- Requirement: Lumos Spell.
Field Guide Page - Bell Tower
Description
- Location: There are stairs at the corner of the Bell Tower in Hogwarts. There's a Stone Fire Pit, the Field Guide Page will be summoned by igniting the pit.
- Requirement: Incendio Spell.
Field Guide Page - Hogwarts Garden
Description
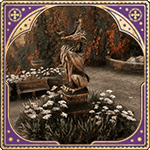
- Location: Found flying outside flying around the garden and the fountains in Hogwarts.
- Requirement: Accio Spell.
North Ford Bog
Field Guide Page - Spider Sign
- Location: Found found just southeast of Pitt-Upon-Ford at the southwest section of North Ford Bog. [Map Link]
- Requirement: Found by casting Revelio on the sign by the bridge connecting the two sides of town.
Field Guide Page - Antique Horn
Field Guide Page found at the Northeast section of the North Ford Bog.
- Location: Found at the Northeast section of the North Ford Bog. [Map Link]
- Requirement: Revelio Spell
Forbidden Forest
No Field Guide Pages in the Forbidden Forest
Hogsmeade Valley
Field Guide Page - Hogsmeade Path
- Location: Passing a wagon, go up the stairs on the right of the hill you will see the leaf flying. Use Accio to draw the blade toward you
- Requirement: Accio Spell
Field Guide Page - Hogsmeade North
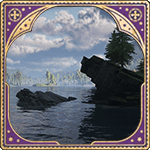
- Location: Found flying over the lake close to the cascade.
- Requirement: Accio Spell
Field Guide Page - Upper High Street
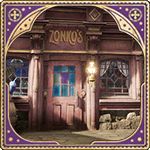
- Location: Found flying in the alley in front of Zonko's Joke Shop.
- Requirement: Accio Spell
Field Guide Page - Hog's Head Alley
- Location: At the back of the Hog's Head Alley, next to the chest there's the mirror
- Requirement: Accio Spell
Field Guide Page - Tomes and Scrolls
- Location: At the Tomes and Scrolls bookshop, head up the stairs to catch the flying Field Guide Page
- Requirement: Accio Spell
Field Guide Page - Spire Alley
- Location: Close to the Spire Alley, in the Moth Mirror.
- Requirement: Lumos Spell
Field Guide Page - River Page
- Location: Near the Magic Neep, standing on the bridge, you can see a flying field guide page.
- Requirement: Accio Spell
Field Guide Page - Dogweed and Deathcap 1
- Location: Outside the Dogweed and Deathcap store north of the Hogsmeade village proper, look above the store to find a flying Field Guide Page.
- Requirement: Accio Spell
Field Guide Page - Dogweed and Deathcap 2
- Location: Inside the Dogweed and Deathcap store north of the Hogsmeade village proper, look to the right to find an Empty Picture Frame. Cast Lumos near it to reveal a painting of a chimney. Head outside the store and make your way to the chimney. Cast Lumos again to attract the moth sitting on the chimney to your wand. Guide it to the frame to reveal the page.
- Requirement: Lumos Spell
Field Guide Page - Madam Snellings Tress Emporium
- Location: Next to the Madam Snelling Tress Emporium salon there's an alley where you can find a flying Field Guide Page
- Requirement: Accio Spell
Field Guide Page - Spire Alley
- Location: At the Spire Alley stairs, look at the mountains to find the Flying Field Guide Page.
- Requirement: Accio Spell
Field Guide Page - Flutes and Lutes
- Location: From the Flutes and Lutes store, go ahead the road, over the stairs next to a house you can find a flying Field Guide page
- Requirement: Accio Spell
Field Guide Page - Pumpkin Fizz
- Location: Located at Upper Hogsfield. [Map Link]
- Requirement:
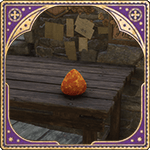
Field Guide Page - Runespoor Egg
- Location: Found within Falbarton Castle. Use Revelio to show the page on the northeastern side of the grounds. [Map Link]
- Requirement: Revelio Spell
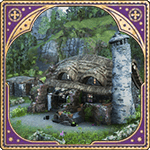
Field Guide Page - Squib Cottage
- Location: Found northeast of Hogsmeade, just southwest of East Hogsmeade Valley Floo Flame. [Map Link]
- Requirement: Revelio Spell
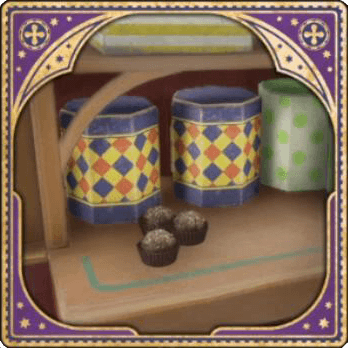
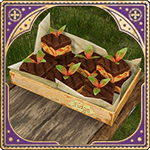
Field Guide Page - Chocolate Frogs
- Location: Found southeast of Hogsmeade near the border between Hogsmeade Valley and South Hogwarts Region. [Map Link]
- Requirement:
North Hogwarts Region
Field Guide Page - Alihosty Fudge
- Location: Found at the eastern part of North Hogwarts, just southeast of The Collector's Cave. [Map Link]
- Requirement:
South Hogwarts Region
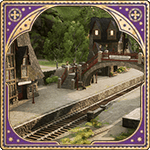
Field Guide Page - Hogsmeade Station Ticket Office
- Location: Found in front of Hogsmeade Station. Use Revelio to reveal the page. [Map Link]
- Requirement: Revelio Spell
Field Guide Page - Spider Parts
- Location: Found near Aranshire located in South Hogwarts Region. [Map Link]
- Requirement:
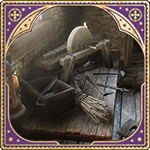
Field Guide Page - Groundskeeper's Tools
- Location: Found north of Lower Hogsfield in South Hogwarts Region. [Map Link]
- Requirement:
Feldcroft Region
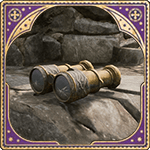
Field Guide Page - Broken Binoculars
- Location: Found atop the balcony of a castle on the road North of Feldcroft. [Map Link]
- Requirement:
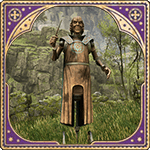
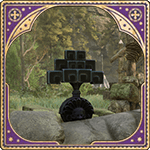
Field Guide Page - Practice Dummies
- Location: Found near the training dummies found on the small road east of Feldcroft. [Map Link]
- Requirement:
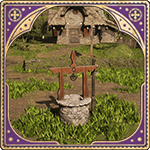
Field Guide Page - The Feldcroft Well
- Location: Found just east of the Feldcroft Floo Flame. [Map Link]
- Requirement:
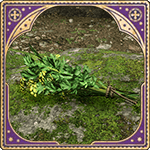
Field Guide Page - Lovage Bouquet
- Location: Found just south of Feldcroft. [Map Link]
- Requirement:
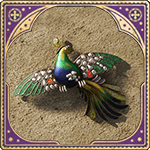
Field Guide Page - Jewelled Brooch
- Location: Found by casting Revelio next to the windmill in Irondale. [Map Link]
- Requirement: Revelio Spell
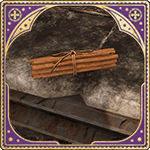
Field Guide Page - Cinnamon Bark
- Location: Found southeast of the Feldcroft Catacomb Floo Flame near two Bandit Camps. Can be seen near a fireplace. [Map Link]
- Requirement: Revelio Spell
Field Guide Page - Peruvian Instant Darkness Powder
- Location: Found on the hill near the West Hogwarts Valley Floo Flame. [Map Link]
- Requirement: Revelio Spell
Hogwarts Valley
Field Guide Page - Murtlap Tentacles
- Location: Found just west of Central Hogwarts Valley Floo Flame. [Map Link]
- Requirement: Revelio Spell
Field Guide Page - Hebridean Black Scale
Field Guide Page - Enchanted Scarecrow
Field Guide Page - Ginger Root
Field Guide Page - The Tilted House
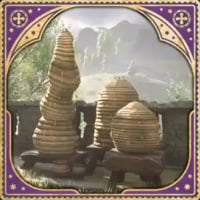
Field Guide Page - Beehives
Field Guide Page - Lace Doily
- Location: Found by a tomb in an abandoned ruins containing a Treasure Vault and Ancient Magic Hotspot west of Keenbridge. [Map Link]
- Requirement: Revelio Spell
Field Guide Page - Doxy Egg
- Location: Found inside a tent within the Small Bandit Camp in South-West Hogwarts Valley. [Map Link]
- Requirement: Revelio Spell
South Sea Bog
Field Guide Page - Abandoned Bothy
- Location: Found within central South Sea Bog, just south of Northern South Sea Bog Floo Flame. [Map Link]
- Requirement: Revelio Spell
Coastal Cavern
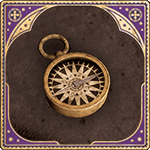
Field Guide Page - Antique Compass
- Location: Found just south of North Poidsear Coast Floo Flame. [Map Link]
- Requirement: Revelio Spell
Poidsear Coast
No Field Guide Pages in Poidsear Coast
Marunweem Lake
No Field Guide Pages in Marunweem Lake
Manor Cape
No Field Guide Pages in Marunweem Lake
Cragcroftshire
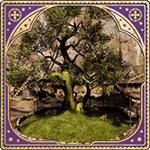
Field Guide Page - Giant Shade Tree
- Location: Found next to the giant tree by the merchant in Cragcroft. [Map Link]
- Requirement: Revelio Spell
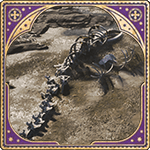
Field Guide Page - Dragon Skeleton
- Location: Found south coast of Cragcroftshire, near a Medium Bandit Camp. [Map Link]
- Requirement: Revelio Spell
Clagmar Coast
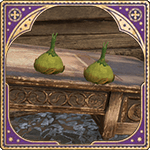
Field Guide Page - Pungous Onion Bulb
Field Guide Page - Acromantula Venom
- Location: Found northwest of Clagmar Castle Floo Flame, inside a Medium Bandit Camp. [Map Link]
- Requirement: Revelio Spell
Hogwarts Legacy Field Guide Pages Comprehensive Guide
Commonly, collectibles can be first found in accessible areas, but it will become gradually harder for Players to find them as they advance in the game. Primarily, every time Wizards are exploring they must perceive the little hints that the game gives them to notice or have an idea of where to find Field Guide Pages.
Hogwarts Legacy Invisible Field Guide Pages
Field Guide Pages that are hidden with the spell of Invisibility, can be noticed as they often show a little glowing glare at their position, players should approach and cast Revelio, and the Field Guide Page will become visible and the player will be able to interact with it.
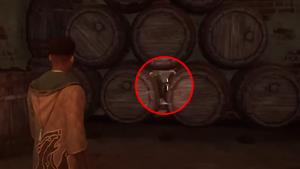
A glowing glare can be seen next to these barrels.
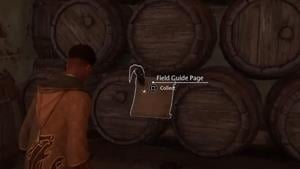
The Field Guide Page is revealed after casting Revelio.
Global Field Guide Pages Counter in Hogwarts Legacy
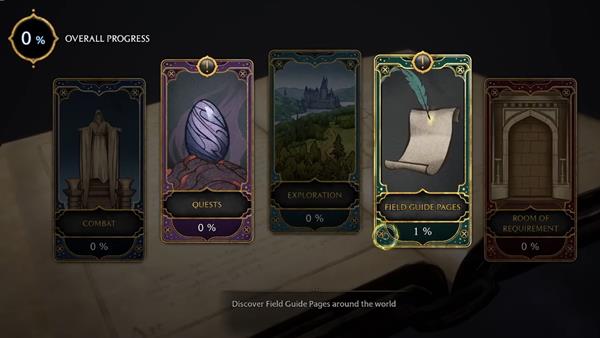
There's a global counter for All Field Guide Pages in this Harry Potter Game. Players can find it by accessing the Challenges tab. Sadly, this counter is measured in percentage and does not display the exact number of total or found Field Guide Pages. It still lets players know how far they are from finding all Field Guide Pages, and it's still useful for completionist runs.
Floating & Roaming Guide Pages in Hogwarts Legacy
Keep an eye on all surroundings and check every corner, even at heights, as a Field Guide Page may be floating and roaming above your head but out of reach. In case one of these is found, cast Accio towards the Page to bring it to reach, and then it will be possible to interact with it.
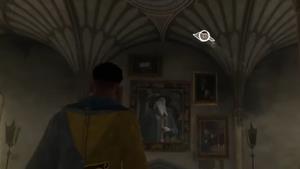
A floating Field Guide Page can be seen near the ceiling.
Solve Puzzles in Hogwarts Legacy
In their adventure, Wizards will surely come across some puzzles that don't seem to be related to any quest. These puzzles may have to be solved using a specific spell hinted by some comment done by someone nearby, or maybe some symbol or text. Completing a puzzle will always be rewarding, unlocking secrets, items, information, or a collectible such as the Field Guide Pages.
If you are uninterested in completing any side quests other than collecting all Field Guide Pages, you can first check if there's still any Field Guide Page yet to find in the location you are visiting before attempting to solve a puzzle.
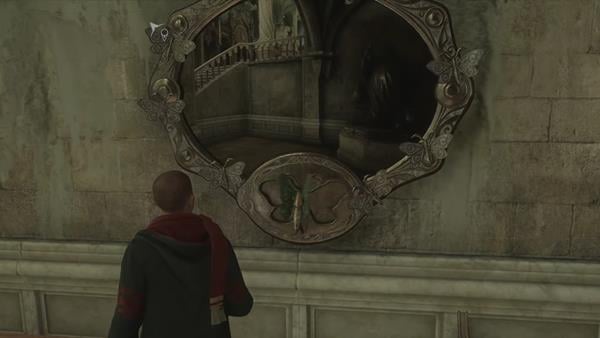
A student comments the Mirror is somehow triggered by Lumos. Casting Lumos near the mirror, causes the mirror to display the image of a Location where a butterfly can be found. The butterfly will follow the Wizard by casting Lumos close to it, Then the Wizard can place the butterfly in the empty slot by returning to the mirror with the following butterfly.
Remaining Field Guide Pages in Hogwarts Legacy
Every time a player finds a Field Guide Page, a message will pop up at the top right corner of the screen, announcing the number of pages in the area. This message also displays the total amount of Field Guide Pages that can be found in the area. This way, players know if they should keep on the lookout for more Field Guide Pages, and they can be certain to have found all Field Guide Pages.

You can search by Name, Location or Description, Just type into the search box what you are looking for.
Quick Search of All Revelio Pages in Hogwarts Legacy
Name |
Description |
Location |
How to find |
|
This bust created in honour of Ravenclaw house resides in the lofty Ravenclaw Tower. | Ravenclaw Tower, Hogwarts | Ravenclaw Bust can be found during your first encounter with Professor Matilda Weasley, as you descend the stairs from the Ravenclaw Common Room, you will encounter a bust halfway down. Use the Revelio spell to obtain the Revelio Page. |
|
This ornate fountain features intricately carved statues of denizens of the magical world. including a set of stone sirens encircling the fountain's base. | Grand Central Hall, Hogwarts | Use Revelio on the Fountain of the Grand Central Hall to reveal it |
|
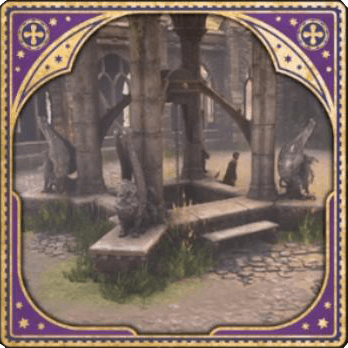
Some students believe that a wish made over The Well of Four Beasts - whether near the Thestral, Griffin, Chimaera, or Hippogriff - will come true for one who has gained the trust of any of the four. | Hogwarts South Exit, Hogwarts | Use Revelio on the Well of Four Beasts to reveal the page. The Well can be found on the way to the Hogwarts South Exit Floo Flame. |
|
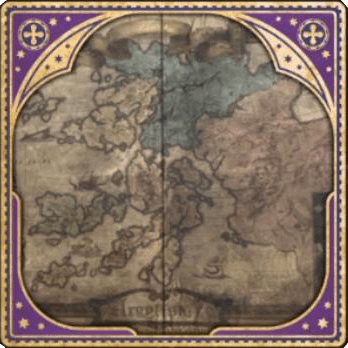
The map depicts Argyllshire, a region in Scotland which contains the Hebrides - native home of the Hebridean Black Dragon. | Past the Crossed Wands duel club area, Hogwarts | Use Revelio on the map just after the bridge, in which you can find Astoria Crickett and Lawrence Davies. Past the big wooden door, on the left side. |
|
Unless in dire straits, it is probably best to avoid this particular toilet as it is allegedly one of Peeves's favorite pranking spots. | Haunted Toilets, Hogwarts | After obtaining Map of Argyllshire, continue forward and turn left. There will be two doors on your left, cast Revelio on the second one to obtain this page. |
|
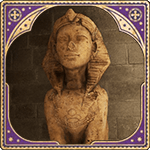
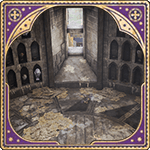
The sphinx, a beast with a human head on a lion’s body, has been used by witches and wizards for centuries to guard valuables and secret hideaways due to its intelligence and affinity for puzzles and riddles. | Hieroglyphic Hall | History of Magic classroom, behind a locked door. |
|
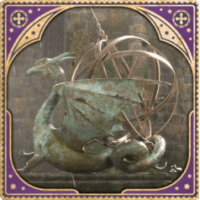
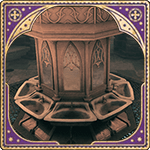
This fountain in the Transfiguration Courtyard has a likeness of a wyvern on top and serves as a relaxing place for students to gather. Despite rumours to the contrary, possibly started by Sir Cadogan, this is most assuredly not meant to be the Wyvern of Wye, slain by the lively knight in spite of himself. | Transfiguration Courtyard, Hogwarts | Use Revelio on the Wyvern Fountain to reveal the page. |
|
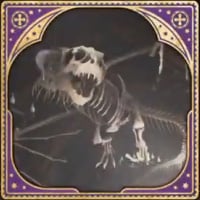
This large dragon skeleton that hangs in the Defence Against the Dark Arts classroom is allegedly a trophy taken by Professor Hecat after she single-handedly defeated one of the largest poaching rings in Eastern Wales during the Great Poacher Raid of 1878. | Defense Against The Dark Arts (Classroom), Hogwarts | Use Revelio on the 'balcony' of the short stair. |
|
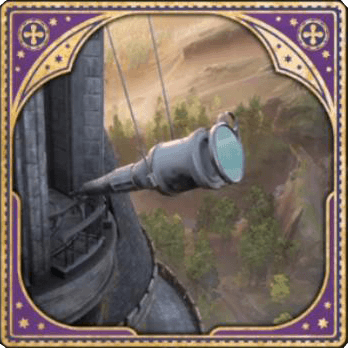
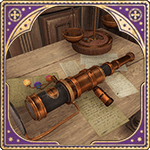
This telescope is the finest stargazing instrument of its kind, perfect for viewing the moon and the stars and anything else one might find in the night sky. | Astronomy Tower, Hogwarts | Use Revelio on the big telescope found in the Tower. Climb the spiral staircase to find it. |
|
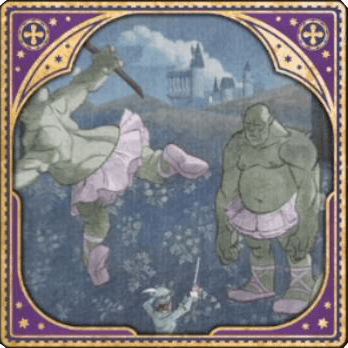
This tapestry depicts the wizard Barnabas the Barmy's foolish attempt to train trolls for the ballet. One can only image the impact on the arts had he succeeded. | Astronomy Tower, Hogwarts | Take the spiral staircase from Defenseo of the Dark arts to the Astronomy Tower. You will eventually find a giant tapestry on your right. Cast Revelio on it to reveal the page. |
|
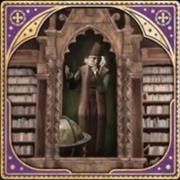
One of the first librarians of Hogwarts is depicted here. Rumour is that he had no tolerance whatsoever for noisy students and was known for his liberal use of the Silencing Charm at the slightest sneeze. | Library, Castle | Found at the Upper area between the two circular stairs. Cast Revelio, it's easy to find. |
|
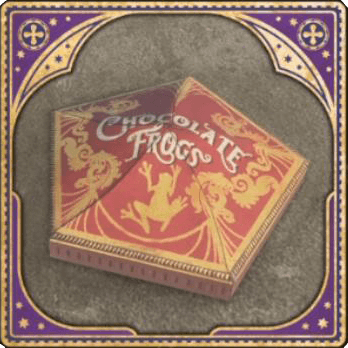
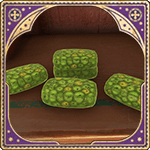
Likely left behind by a Hogwarts student visiting Hogsmeade, these enchanted confections hop around like real frogs and each comes with a collectible card, featuring a famous witch or'wizard. | Lookout, The Highlands | Found on a bench in The Highlands Lookout |
|
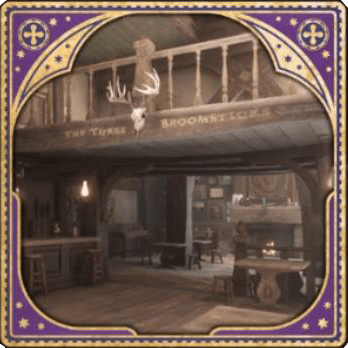
Currently run by Sirona Ryan, and allegedly as old as Hogsmeade itself, the Three Broomsticks is the longstanding gathering spot for villagers and Hogwarts students who want to enjoy a Butterbeer or Firewhisky. | Tabern, Hogsmeade | Found inside the tavern on The Lower High Street in Hogsmeade. It is above the inner hearth. |
|
A favourite among pranksters, the Dungbomb produces a foul odour, causing anyone in the vicinity to evacuate posthaste. | Zonko's Joke Shop. Hogsmeade | Found on the right shelf on the second floor of Zonko's Joke Shop |
|
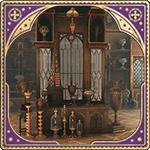
This broken broom belonged to Selene Wartnaby and is rumoured to be all that remains after she insisted on demonstrating her experimental 'Lunar Apparition Charm' to fellow third-years. No one knows if she succeeded. | Bell Tower, Hogwarts | Found at the decorative Broom, cast Revelio. |
|
Glumbumbles are magical flying insects that produce a treacle which will cause melancholy if consumed. They feed on nettles and nest in dark and secluded places. Unfortunately, they are known to infest beehives, having a devastating effect on the honey therein. | Hogwarts Garden | Found at the Hogwarts Garden, next to beehives. |
|
This cart belongs to Timothy Teasdale, who runs the Magic Neep. He enjoys being in the 'thick of things' and engaging with customers outside the shop | The Magic Neep, Hogsmeade | The Magic Neep, Hogsmeade. Use Revelio by the cart next to Timothy Teasdale. |
|
J Pippin's Potions, established in 1753, is the apothecary in Hogsmeade where proprietor Parry Pippin sells a wide variety of potions and their ingredients. His stock changes up and introduces new potions, so his inventory may vary after each visit. | J. Pippin's Potions, Hogsmeade | J. Pippin's Potions, Hogsmeade. Use Revelio in the shop by Parry Pippin. |
|
The barkeep in Keenbridge keeps a stock of ginger root handy to fend off his customers' nausea - keep them imbibing a bit longer. | Keenbridge | At the main Bar Table in Keenbridge. Use Revelio when facing the bar area. |
|
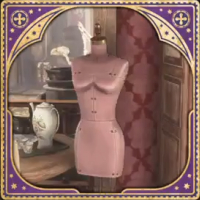
Unlike the enchanted mannequins favoured by students for duelling practice, the mannequins at Gladrags serve only as a means to display the latest in wizarding fashion. | Hogmeade, Gladrags Wizardwear | Next to the entrance of the store, there's a pink mannequin, cast Revelio towards it. |
|
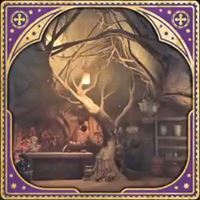
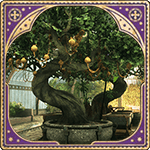
This large tree with winding branches supports the shop Dogweed and Deathcap. | Dogweed and Deathcap, Hogsmeade | Next to the store's counter is a large tree. Look at it an cast Revelio to reveal the page. |
|
It seems someone has been collecting Acromantula parts for profit. Lucrative, perhaps, if one is willing to risk one's life to obtain the required inventory. | Aranshire | |
|
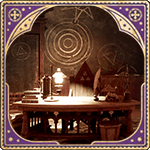
This classroom is where students learn about the magical properties of numbers and numerology – though a great many opt instead to spend the period 'counting Mooncalves' whilst nodding off at their desks. | Library Annex, Hogwarts | Within the Arithmancy Classroom. You first need to solve an Arithmancy Door puzzle to enter here. |
|
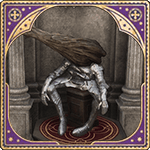
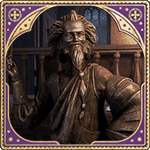
This statue with an ingratiating grin depicts the medieval wizard Gregory the Smarmy, the wizard famous for inventing Gregory's Unctuous Unction, a potion that makes the drinker believe whoever gave them the potion is their best friend. | Central Hall, Hogwarts | Head to the Southwestern entrance of the Central Hall from the Floo Flames. Take a left at the Central Fountain, descend the steps, and then make another left turn. The statue is situated to the right of the staircase leading up to the main fountain and is conveniently located next to the Floo Flame for the Potions Classroom. The Field Guide page can be found directly in front of the statue |
|
Here perch the slimy yet symphonic frogs that comprise the Hogwarts Frog Choir. These magical amphibians can sing in six-part harmony and hold a pitch better than most humans. | Bell Tower, Hogwarts | Can be found in a Musical Room located at the top of the Belltower and can be reached either by taking the long stairs in the south corner of the room or by ascending the stairs in the North Hall. |
|
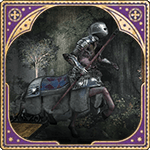
This set of armour belonged to Sir Scagglethorpe the Heedless who unwisely challenged a mountain troll to a game of musical chairs. | Bell Tower Courtyard | From the Bell Tower Courtyard Floo Flames, the Field Guide page can be located by simply heading left and moving straight ahead |
|
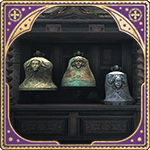
The Three Sisters Bells are said to be a tribute to three similarly named, beautiful steep ridges that rise majestically over a glen in Argyllshire. It is rumoured that one can hear them ring in the glen, way across the Highlands, when they are rung in the castle. Locals have been baffled by the mysterious ringing for years. | Bell Tower Courtyard | From the Bell Tower Courtyard Floo Flame, head right to find the page next to a cabinet |
|
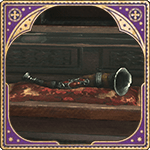
Horns like this were used by goblins during the 1612 Goblin Rebellion to rally troops and generally annoy witches and wizards. This horn was discovered in the aftermath of the rebellion behind the Hog's Head Inn, with a wedge of gorgonzola stuffed inside – presumably to mute it. | Bell Tower Courtyard | When in the Bell Tower Courtyard, ascend the stairs on the left. On your right, a display cabinet will be visible with this Revelio page in front of it |
|
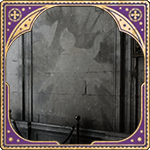
Allegedly the location of the first known instance of an arguably successful casting of Bombarda. Date unknown, caster unidentifiable. | Bell Tower Courtyard | Starting from the Bell Tower Courtyard, climb the staircase on the left side. Once you reach the top, turn your gaze to the left and proceed to climb a few additional steps. This page located in front of a scorch mark. |
|
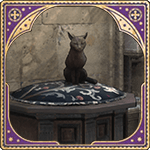
This wooden statue bears the likeness of Pangur Donn, fearless feline mouse hunter and devoted study companion. | Bell Tower Courtyard | Position yourself at the Bell Tower Floo Flame. From this point, climb the staircase on the right. Afterwards, search for the statue of the cat and you will discover the page next to it. |
|
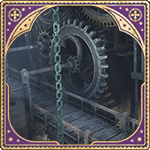
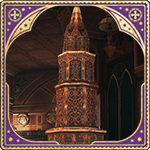
While the moving gears of the clock tower's inner mechanics serve as a deterrent to many, others find the privacy offered by the cogs and wheels appealing. | Clock Tower | From the Hospital Wing Floo Flames take your right. Go ahead into the clock tower and go down the steps on your right. Take the pathway that circles around until you reach the front of the clock. Stand in front of the clock mechanism and you'll locate the page |
|
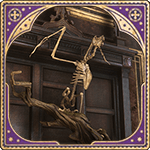
This is a skeleton of an Irish phoenix or Augurey – an intensely shy bird who can forecast the coming of rain and whose mournful cry was once believed to foretell death. | Defence Against the Dark Arts Tower | From the Defence Against the Dark Arts Tower Floo Flames, head down the stairs ahead and then down to the right. On the far wall is a wooden cabinet with a skeleton inside. |
|
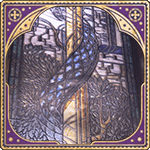
Although Slytherins like to think this window is somehow a tribute to their house founder, it is actually a serpentine beast coiled around a tree that extends from the mouth of the legendary Green Man. | Defence Against the Dark Arts Tower | From the Defence Against the Dark Arts Classroom Floo Flames, go down the stairs to the right. Go forward past the animal skeleton, then turn right to face the tall stained glass window. |
|
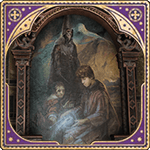
This painting depicts the young orphan wizard Illyius, who famously saved his entire village from an army of Dementors and the Dark wizard Raczidian by conjuring a mouse Patronus. | Defence Against the Dark Arts Tower | From the Transfiguration Courtyard Floo Flames, turn right and head inside. Go right and the page is in front of a large portrait. |
|
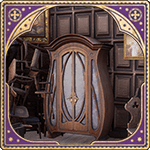
This old cupboard is said to have once contained a powerful Boggart that five professors working together could barely repel as it shifted among werewolf, tornado, a plate of haggis, a Hungarian Horntail and someone’s mother-in-law. | Defence Against the Dark Arts Tower | From the Transfiguration Courtyard Floo Flames, turn right and go inside. To the right of the big staircase is a locked door between two gargoyles (requires Alohomora Level 2 to open). The Field Guide page is at the back of the room by the closet. |
|
This standing model of a hand is demarcated to help students in the practice of palmistry. Depending upon the angle at which this model is read, it either has a considerable life line or is likely to die in a fortnight. | Divination Classroom | From the Divination Classroom Floo Flames, use spiral staircase to go up. At the top, climb the ladder that appears. At the top, go to the centre of the room to find this page. |
|
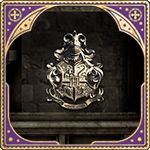
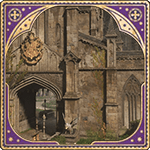
The Hogwarts coat of arms includes a lion, snake, eagle, and badger, representing each of the four houses, along with the school motto: 'Draco dormiens nunquam titillandus', which means ‘never tickle a sleeping dragon.’ | The Great Hall | Hogwarts' Front entrance near the Great Hall. |
|
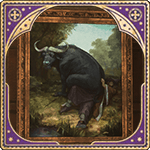
This portrait depicts the wizard Baruffio, famed for his Brain Elixir and as an example of what happens when incantations are improperly spoken: he once said 's' instead of 'f' and found himself on the floor with a buffalo on his chest. | Faculty Tower | From the Faculty Tower Floo Flames, head left down the corridor. On the right, the portrait is at nearest staircase. |
|
Many assume this to be the shell of a Fire Crab, native to Fiji. However, those in the know swear it’s a bejewelled tortoise shell created by a mad wizard near Versailles. When his chateau was overrun by Nifflers, the dazzling shell was carried off to be discovered years later by a Hogwarts professor on holiday in the Ardennes. | Faculty Tower | After completing the Main Quest The Caretaker’s Lunar Lament. In the“restricted” area of Faculty Tower. Climb the stairs and at the top on the left is a tortoise shell in a cabinet |
|
Sketched inside the cover of this old, slightly worn set of serialised adventure novels is what looks like a gazelle. Perhaps the novels were a gift to Professor Onai or her daughter Natsai. | Faculty Tower | After completing the Main Quest The Caretaker’s Lunar Lament. In the restricted area behind a locked door (requires Alohomora Level 2). |
|
This statue of a lost-looking wizard known as Boris the Bewildered has perplexed students for ages. Is he coming or going? Is he at the beginning of a journey or the end? Perhaps we shall never know. | Faculty Tower | After completing the Main Quest The Caretaker’s Lunar Lament. From the Hospital Wing Floo Flames, go down the spiral staircase. |
|
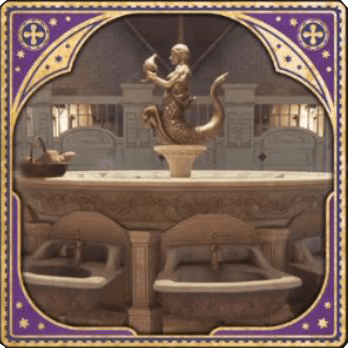
The Prefects' bathroom features a swimming-pool-sized bathtub that can be filled with enchanted soap and colourful bubbles, as well as a beautiful painted mural depicting a mermaid. | Faculty Tower | From the Hospital Wing Floo Flames, go down the spiral staircase, and enter the door on the left |
|
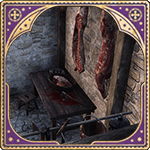
At first glance, one might be inclined to alert the authorities regarding this sight. Rest assured, however, that it is merely bloody meat used to feed the Thestrals. | Flying Class Lawn | Inside the stables, behind a locked door. |
|
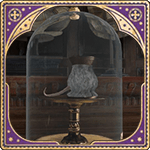
This partially Transfigured teacup – likely the soon-to-be-reversed error of a second-year – serves as a cautionary tale for those students who do not take seriously the complexities and dangers of Transfiguration. | Transfiguration Classroom | In Transfiguration Classroom, head down the left-hand walkway, and opposite the desks is a glass dome with a dish inside. |
|
This set of stained-glass windows features Merlin, the four Hogwarts founders, and various other witches and wizards of the ages. | History of Magic | Inside History of Magic classroom. |
|
School owls and owls owned by students can be found in the Hogwarts Owlery. One is advised to explore carefully, keeping an eye out for owl droppings and regurgitated mouse skeletons. | Hogwarts Owlery | On top of Hogwarts Owlery. |
|
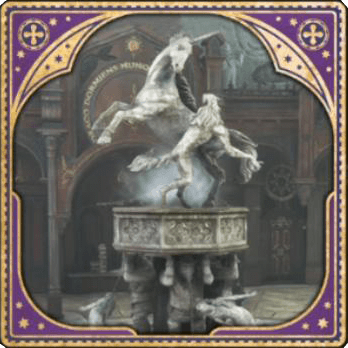
The majestic unicorn fountain gives an air of serenity and calm to the hospital wing at Hogwarts. | Hospital Wing | Right to the Hospital Wing Floo Flames. |
|
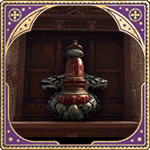
This particular urn is rumoured to have once borne the inscription: 'Pioneer in Dragon Taming. Should not have started with the Hungarian Horntail.' | Bell Tower Courtyard | Next to a dragon urn, Bell Tower Courtyard Floo Flame |
|
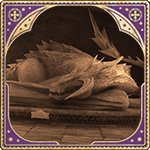
The Hogwarts motto 'Draco Dormiens Nunquam Titillandus' means ‘Never Tickle a Sleeping Dragon.’ Fortunately, this particular sleeping dragon is made of stone and will never awaken. It may be tickled to absolutely no effect. | Hogwarts Astronomy Tower | At the ground of Hogwarts Astronomy Tower near some stairs and some distance from gate of the outher wall. |
|
Hidden behind the statue of a one-eyed witch is a secret passageway from Hogwarts to the cellar at Honeydukes. It can only be accessed using a particular charm. | One-Eyed Witch Passage | Take the Quest from Gareth Weasley called Dissending for Sweets |
|
Along with powerful protective enchantments, these defensive ramparts have safeguarded Hogwarts castle for centuries. The ancient rooms and corridors along the ramparts might be worth exploring, as they harbour mysteries of their own. | Quidditch Field, Hogwarts | Castle Ramparts can be found on the south side of the Quidditch Pitch, by the broken stone fence. |
|
The Hogwarts Quidditch pitch is the site of intense house rivalries, as Chasers, Beaters, Keepers, and Seekers take to the skies in pursuit of the Quidditch Cup. That is, of course, when the favourite sport of the wizarding world has not been cancelled for the year by an exceptionally oblivious headmaster. | Quidditch Field, Hogwarts | |
|
To gain entrance to the Ravenclaw common room, one must solve a rather esoteric riddle, using logic and reasoning, posed by the eagle doorknocker. | Ravenclaw Tower | At the entrance to the Ravenclaw common room |
|
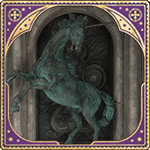
This statue depicts the Kelpie, a shapeshifting water demon native to Ireland and Great Britain, which usually takes the form of a long-maned horse. The largest Kelpie ever reported is the Loch Ness monster in Scotland. | Slytherin Dungeon | From the Lower Grand Staircase Floo Flames, head down the stairs ahead, then up another stairs to the left. the page is beside a large statue. |
|
To enter the Hufflepuff common room, one must tap the barrel two from the bottom, middle of the second row, in the rhythm of ‘Helga Hufflepuff.’ An errant tap will result in being denied access and doused in vinegar. | Hufflepuff Common Room | At the entrance to the Hufflepuff Common Room, in front of the barrels stacked against the wall. |
|
Rumoured to contain some of Helga Hufflepuff's original creations, this book holds a collection of Hogwarts students' favourite recipes over the centuries. Some dishes, like pickled Dirigible Plums, are likely an acquired taste. | Hufflepuff Common Room (staircase) | On the spiral staircase that leads down to the Hufflepuff Common Room, opposite a cabinet half-way down. |
|
The Hogwarts Architect, shown here surrounded by the four house mascots, designed and oversaw the construction of Hogwarts castle alongside founder Rowena Ravenclaw, who is credited with creating its ever-changing floorplan. | Grand Staircase | From house point hourglasses, heading up the steps, in front of a black statue. |
|
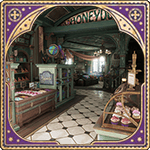
Honeydukes sweet shop sells a variety of magical sweets – from Fizzing Whizzbees to Exploding Bonbons. Customers would be wise to know precisely what effect they may experience before sampling this shop’s wares. | Honeydukes | Just outside the Honeydukes main door. |
|
The savvy student is wise to keep an eye on the stairs, as they will change position without notice. While certain students may not mind being late for class, they may very well regret being late to dinner. | The Grand Staircase | In the Grand Staircase, it can be encountered as you go up the stairs. Easiest accessible from the Ravenclaw Tower Floo Flames. |
|
This unusual suit of armour was crafted for a troll. That it has survived at all is astonishing since trolls do not ordinarily wear armour and would understandably be prone to smashing it in confusion or anger. | The Grand Staircase | The display can be found in The Grand Staircase specifically the Trophy Room |
|
This room contains the House Cup, Quidditch trophies, duelling trophies, and other awards given at the school. Students who step out of line can be found polishing the silver here, by hand, as a reminder of the value of hard work. | The Grand Staircase | The trophy room can be found in the Grand Staircase area. |
|
The Goblet of Fire rests within this ancient, jewel-encrusted chest. The Goblet has served as a means of selecting champions for the Triwizard Tournament since the contest's establishment in the late 13th century. | The Grand Staircase | The Grand Staircase specifically the Trophy Room |
|
This unique set of armour was created as a misguided peace-offering to a centaur leader. The gift was spurned and the messenger shot through the leg with an arrow. The armour itself, battered with hoofmarks, was later recovered and refurbished. | The Grand Staircase | The Grand Staircase specifically the Trophy Room |
|
Scratched into one of the copper taps on this seemingly ordinary sink in the girls’ toilets is a small snake. No one knows what it means. | Slytherin Dungeon | In girls’ bathroom, in front of the sinks. |
|
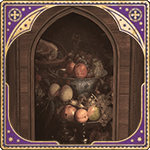
If one tickles the pear in this still-life painting of a bowl of fruit, it will giggle before turning into a doorknob to allow entry to the Hogwarts kitchens. | Hufflepuff Common Room | From the Grand Staircase Floo Flames, head right and go down the staircase. At the bottom, look to the left to find a large painting of a bowl of fruit |
|
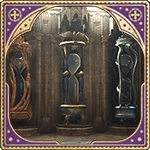
These large, ornate hourglasses containing rubies, diamond, sapphires, and emeralds are enchanted to keep count of house points for Gryffindor, Hufflepuff, Ravenclaw, and Slytherin, respectively. | Grand Staircase | House Point Hourglasses can be found in the Great Hall near the large Hourglass |
|
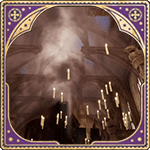
The ceiling of the Great Hall has been bewitched to mimic the sky above the castle. | Great Hall | The gap between the Gryffindor and Ravenclaw tables. |
|
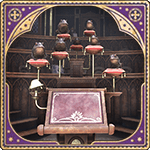
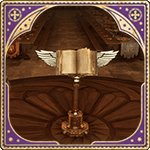
This enchanted lectern serves as the spot from which the great headmistresses and headmasters of Hogwarts – as well as Professor Black – address the school. | Great Hall | The middle of the grand hall. |
|
Although this smoke-breathing gargoyle might appear to be enchanted, it is actually the Hufflepuff common room chimney. | The Great Hall | Close to the great hall floo flames, it will be located in the outdoor area that can be accessed with the door directly to the right. |
|
The Black Lake or Great Lake (the sitting Headmaster vainly prefers the prior) is an expanse of fresh water south of the castle. The lake's murky depths are home to merpeople, Grindylows, and other magical, aquatic beasts and beings, including the giant squid – a surprisingly friendly cephalopod with a fondness for toast. | Great Hall | Located near the Boathouse close to the Great Hall |
|
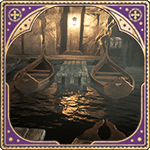
Located deep beneath the viaduct courtyard is the landing for boats delivering first-year students across the Black Lake to Hogwarts. | Underground Harbour | Use the elevator in Viaduct Courtyard takes you down to the Underground Harbour. The page is at right-hand side of the docks. |
|
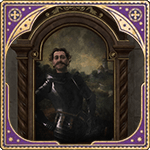
Sir Cadogan was allegedly friends with Merlin himself, and as such became a sworn Knight of the Round Table – although he is only really known to the wizarding world. He is famous for his defeat of the Wyvern of Wye and now spends his days challenging students to duels. | Central Hall | Go up the stairs from the Central Hall, opposite some portraits. |
|
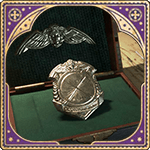
Aurors comprise the Ministry’s magical law enforcement and protect the wizarding world from all sorts of threats – particularly those posed by Dark Magic. This Auror badge belongs to Professor Sharp. | Potions Classroom | On Professor Sharp’s desk. |
|
This passage is relatively non-descript as far as passages go. However, the mishandling of a crop of Mimbulus mimbletonia in the sixteenth century – and the accompanying tsunami of Stinksap – left it with a rancid odour that even the strongest Scouring Charm cannot seem to eradicate. | Pungent Passage | The Closest would be the West Tower Floo Flames. Simply follow the stairs to the left and you will find the Pungent Passage |
|
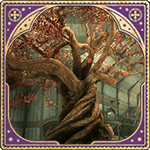
Situated at the centre of a Hogwarts greenhouse, this giant tree has a system of roots as deep-reaching and convoluted as the school's dungeons. | Greenhouse Tree | Near the central tree. |
|
This orange, radish-like fruit floats upside-down as it grows. Some believe it can enhance one's ability to accept the extraordinary. | Greenhouses | Closeby the Greenhouse Floo Flames, it will be located on the green house on the right with the stairs |
|
Best to avoid these books if possible – due not as much to their tendency to fly from one’s hands as to their content being spectacular drivel of no educational value whatsoever. |
Library | In the Restricted Section of Library. |
|
An oil painting of a beautiful gorgon and her suitor, whose eyes are wisely averted as he bends to kiss her hand. It is said that the artist who painted this accidentally gazed at his subject when he delivered the painting and is now forever a sculpture in a garden in Greece. | Long Gallery | Long Gallery, behind a puzzle door. |
|
This misunderstood artefact is supposedly important to Muggle warfare, though most of wizardkind find the prospect of wielding such a hefty – weapon? – utterly head-scratching. | Muggle Studies | Muggle Studies hallway, behind a locked door. |
|
This portrait guards the Gryffindor common room, requiring a password from any who wish to enter. She and her friend Violet are known to wander among the other portraits, periodically helping themselves to vats of wine therein. | Gryffindor Common Room | The entrance to the Gryffindor Common Room |
|
This statue depicts the wizard Lachlan the Lanky – a tall, slender wizard who appears quite proud of himself. For what precisely, no one knows. | Gryffindor Tower | Close by the Clock Tower Courtyard Floo Flames. It will be direct behind it and in a door in the other side of the walkway. |
|
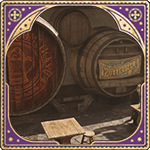
These barrels contain the popular wizarding drink, Butterbeer. It is served both cold and hot and has a slight alcoholic content that seems to impact house-elves much more than humans. | Hogsmeade | In Hogsmeade, the barrels can be found near the Three Broomsticks. |
|
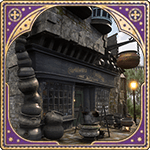
This precariously stacked set of cauldrons outside Ceridwen's advertises the shop's wares. It should be noted that stacking cauldrons in this fashion, while admittedly eye-catching, is ill-advised for anyone wishing to brew a potion of any intended effect. | Ceridwen's Cauldrons | Just outside this shop. |
|
A Sneakoscope is a type of Dark Detector and will spin, whistle, and light up when it detects someone untrustworthy nearby. It should be used with caution, however, as it will alert the untrustworthy to the user's presence almost instantly. | Dervish and Banges | Insdie Dervish and Banges, to the left. |
|
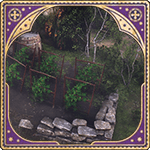
This small community garden in the heart of the village is the perfect spot for growing various herbs and peaceful magical plants. | Hogsmeade | In the middle of the Town which has gatherable plants. |
|
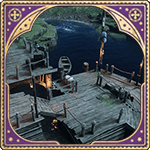
These docks outside the Hog's Head Inn offer a pleasant place to sit and relax, if one can do so whilst only a stone's throw from whatever nefarious goings-on may be occurring in the notoriously shady inn. | Hogsmeade | Close to the West Hogsmeade Floo Flame, close by Hog's Head Inn. |
|
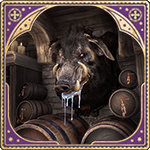
This mounted hog's head rolls its eyes and snuffles its nose as it oversees the seedy atmosphere and decidedly interesting clientele of the Hog's Head. | Hog's Head | Hog's Head |
|
These delicious sweets, rumoured to contain Billywig stings, are small sherbet balls that when consumed will levitate one a few inches off the ground. | Honeydukes | Inside Honeydukes. |
|
The proprietor of this abandoned shop is said to have used a Shrinking Charm to aid in storing his inventory. However, a slight miscalculation ended up – for all intents and purposes – vanishing it. | The Old Fool | On the hill near The Magic Neep and the graveyard. |
|
Wands of a variety of woods and all manner of flexibility, each possessing one of three magical cores, choose their owners in this cosy, cluttered shop run by the amiable and knowledgeable Gerbold Ollivander. In the profession of wandcraft since 382 BC, the Ollivander family are considered the best wandmakers in Britain, if not the world. | Ollivanders Wand Shop | Ollivanders Wand Shop at Hogsmeade. |
|
These chutes in the Post Office magically sort various bits of mail. The Post Office itself houses over 200 owls, colour-coded based on how quickly a particular letter or parcel needs to be delivered. | Hogsmeade Post Office | To the right of Steepley and Sons. |
|
These cats seem to stay close to Scrivenshaft’s quill shop. Perhaps it’s the feather quills that entice them – or perhaps it’s the treats the owner often leaves for them. | Scrivenshaft | In Hogsmeade Square, inside Scrivenshaft. |
|
Reflective of proprietor Mrs Steepley's taste, this tea shop is awash in the colour pink and frills. A cheery, tinkly bell chimes whenever a customer enters. | Steepley and Sons | In Steepley and Sons, next to Mrs. Steepley. |
|
This enchanted staircase in Tomes and Scrolls reveals itself when a particular book is moved. The proprietor here, Thomas Brown, sells a variety of written products, including spellcrafts – handy for conjuration. | Tomes and Scrolls | Hogsmeade. |
|
The only all-wizarding village in Britain, Hogsmeade has been a favourite haunt of Hogwarts students – third-years and up – for centuries. | Hogsmeade | Hogsmeade |
|
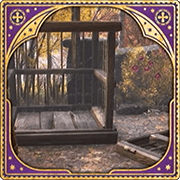
The savvy traveller knows that some water wells may have more to offer than this relatively innocuous water well in the village of Hogsmeade. | Upper High Street | Hogsmeade |
|
An amphibious surprise awaits anyone who tries to wash with this particular bar of soap; once submerged in water, a cohort of wriggling tadpoles hatches right out of the suds. | Zonko's Joke Shop | Inside Zonko's Joke Shop. |
|
Frequented regularly by Hogwarts students and villagers alike, Zonko’s is the place to buy pranks and jokes in Hogsmeade. | Hogsmeade | Hogsmeade |
|
It is said that, centuries ago, a Charms professor kept a troll here on which students could practise particularly challenging spells. Shocking, to be sure, but perhaps unsurprising during a time when Quidditch involved the use of live Snidgets. One can only wonder what it may be used for in the future. | Charms Classroom | From the Charms Classroom, take the stairs to the top, At the top, behind a looked door. Requires Alohomora Level 2 to unlock. |
|
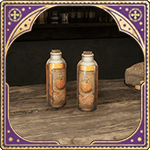
Pumpkin Fizz is a fashionable carbonated drink with a pumpkin flavour. It has yet to become as popular here as Butterbeer, but one never knows. | Upper Hogsfield | Inside the hamlet of Upper Hogsfield. At the front desk in an open room. |
|
Produced via the mouth of the three-headed snake, Runespoor eggs are known to enhance mental agility and as such are often used in potions. | Falbarton Castle | On the northeastern side of the grounds. |
|
This idyllic country cottage belongs to an elderly Squib who chose to live in the wizarding world rather than try to integrate with Muggles like some Squibs do. He is content to farm his land non-magically and supply local hamlets with fresh fruits and vegetables, although he will accept the occasional Engorgement Charm on a gourd or two. | Hogsmeade Valley | Northeast of Hogsmeade, just southwest of East Hogsmeade Valley Floo Flame. |
|
Made with the leaves of the Alihotsy tree, this fudge is a delightful confection that causes uncontrollable laughter. | North Hogwarts Region | At the eastern part of North Hogwarts, just southeast of The Collector's Cave. |
|
This station has stood here since the early 1800s when Minister for Magic Ottaline Gambol acquired a steam engine train to transport students to Hogwarts. The station appeared in Hogsmeade virtually overnight just after the train did. The operation involved using a lot of Memory Charms on Muggle works and the largest mass Concealment Charm ever performed in Britain. | Hogsmeade Valley | In front of Hogsmeade Station. |
|
One might surmise that this set of tools could be enchanted to create all sorts of furnishings for a cosy hut - as large as the occupant may need. | South Hogwarts Region | North of Lower Hogsfield. |
|
These broken binoculars were left here by Muggles attempting to track what they suspected was an odd-looking bear but what was likely a Demiguise. They could not for the life of them understand how something could seem to disappear so quickly | Feldcroft Region | Atop the balcony of a castle on the road North of Feldcroft. |
|
The residents of Feldcroft sometimes use these to practice their spell-casting - especially in light of recent goblin attacks. | Feldcroft Region | Near the training dummies found on the small road east of Feldcroft. |
|
The well in Feldcroft ran dry some four hundred years ago during a great drought. Sadly, many perished as a result, including at least one young boy whose father refused to speak for years thereafter. Legend says that all was saved when a group of benevolent witches and wizards used a never-before-seen powerful magic to restore water to the region. | Feldcroft Region | Just east of the Feldcroft Floo Flame. |
|
This memorial serves as a grim reminder of the power of magical beasts. Years ago, a young witch was killed here by a Graphorn as she awaited her true love. That love now returns to this spot to remember her and leave a bouquet of lovage, her favourite plant. | Feldcroft Region | Just south of Feldcroft. |
|
The gorgeous brooch depicts a magical bird of some sort. Which particular magical bird is unclear, but some believe it's meant to represent one of medieval Irish druidess Cliodna's birds who sang the sick to sleep. | Feldcroft Region | By casting Revelio next to the windmill in Irondale. |
|
It seems at least one goblin finds the food at this encampment a bit bland and has taken to adding cinnamon bark to their stew to liven it up. | Feldcroft Region | Southeast of the Feldcroft Catacomb Floo Flame near two Bandit Camps. Can be seen near a fireplace. |
|
When thrown in the air, this powder from Peru creates an impenetrable darkness resistant to most light-creation spells. The Ashwinders have been using it to steal from surrounding areas without detection. | Feldcroft Region | On the hill near the West Hogwarts Valley Floo Flame. |
|
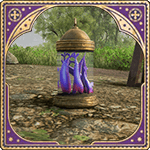
Murtlap tentacles are a rare potion ingredient known to raise resistance to certain Dark charms and contain healing properties. An overdose, however, can cause purple ear-hair. | Hogwarts Valley | Just west of Central Hogwarts Valley Floo Flame. |
|
The Hebridean Black is a large dragon that can grow to over nine metres in length. A large, rough scale, originally belonging to one of these beasts, is one of the prized possessions that Archie Bickle keeps in his hideout. | Hogwarts Valley | Just south of Lower Hogsfield. |
|
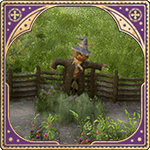
This mischievous-looking scarecrow was long ago enchanted to watch over the garden and ward off crows but now simply harasses gardeners by shouting insults at them while they work. | Hogwarts Valley | Just west of Brocburrow by the garden. |
|
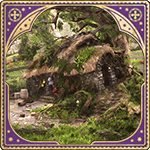
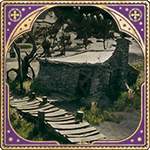
The locals call this the Tilted House due to the odd angle at which it sits wrapped in the roots of the overhanging tree. | Hogwarts Valley | West of Keenbridge Floo Flame. |
|
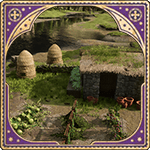
The wizarding world needs honey for their tea as much as the Muggle world does. | Hogwarts Valley | By the garden near Keenbridge. |
|
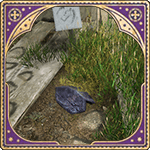
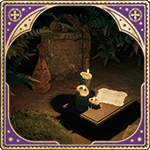
The locals say that this doily was left as a tribute to a beloved house-elf who dreamed of one day wearing it. | Hogwarts Valley | By a tomb in an abandoned ruins containing a Treasure Vault and Ancient Magic Hotspot west of Keenbridge. |
|
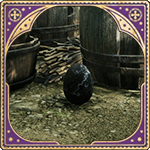
Stolen by poachers for use in potions, these black eggs come from a Doxy - a magical beast sometimes mistaken for a fairy. | Hogwarts Valley | Inside a tent within the Small Bandit Camp in South-West Hogwarts Valley. |
|
This broken-down old bothy used to shelter travelling witches and wizards from the elements. Over time, however, the surrounding bog began to reclaim the bothy. These days, it only plays host to the odd Dugbog or two. | South Sea Bog | Within central South Sea Bog, just south of Northern South Sea Bog Floo Flame. |
|
Unfortunately, the fact that this antique Muggle compass was dropped here means the Muggle who dropped it is probably wandering through Wales by now | Coastal Cavern | Just south of North Poidsear Coast Floo Flame. |
|
This gorgeous tree has served as a home to countless Bowtruckles, fairies, and even, rumour has it, an Augurey or two. Many simply enjoy it for its shade. | Cragcroftshire | Next to the giant tree by the merchant in Cragcroft. |
|
This dragon skeleton may have been here for years - or it could be the result of recent poaching activity. Be wary. | Cragcroftshire | South coast of Cragcroftshire, near a Medium Bandit Camp. |
|
Pungous Onion is a particularly powerful onion used in some potions, including the Cure for Boils. It's best not to touch it with your bare hands. | Clagmar Coast | Northwest of Clagmar Castle Floo Flame. |
|
Both extremely valuable and extremely poisonous, this venom is secreted from the pincers of the carnivorous Acromantula. For obvious reasons, it is much easier to harvest venom from a dead spider than a living one. | Clagmar Coast | Northwest of Clagmar Castle Floo Flame, inside a Medium Bandit Camp. |

